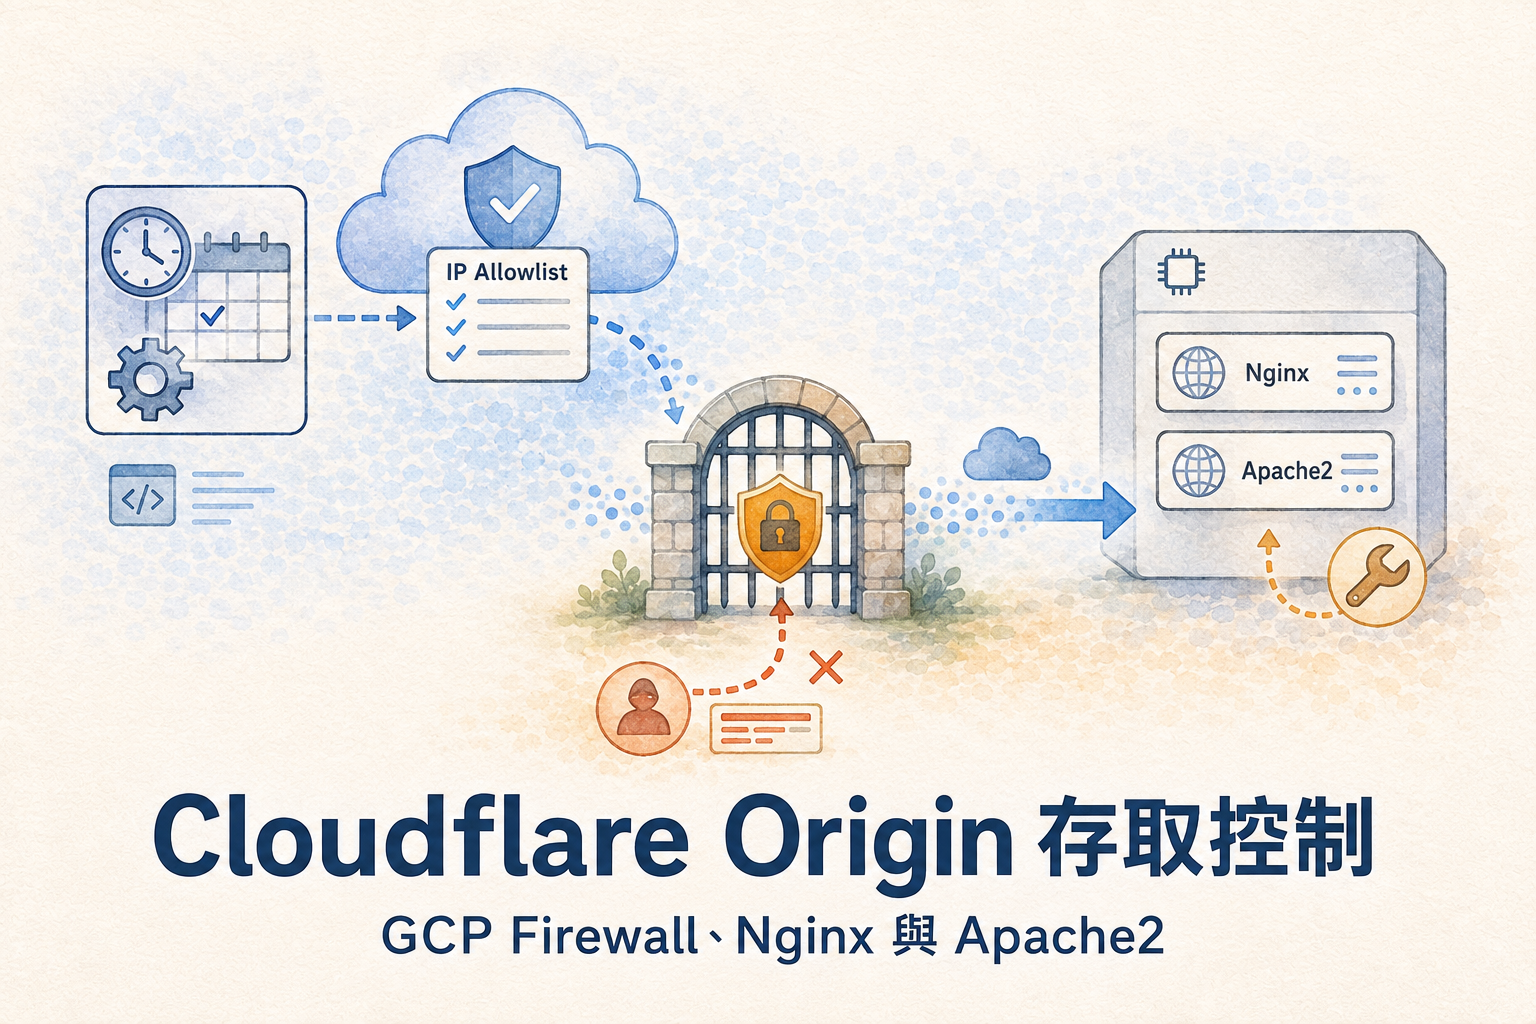
No2. Cloudflare Origin 存取控制:GCP Firewall 與 Web Server 來源限制
Cloudflare DNS 記錄設為 Proxied,只能讓正常的 hostname 解析結果指向 Cloudflare,不能強迫 Origin 拒絕其他連線。只要 GCP VM 的 80 或 443 仍對 0.0.0.0/0 開放,知道 Origin IP 的 client 就可能保留原 hostname,直接將 request 送到 Nginx 或 Apache2。
真正阻止 Origin direct access 的控制,是在 GCP Firewall 或 Web Server 明確執行下列規則:
Cloudflare CIDR → ALLOW
其他來源       → DENY
本文以一台執行 Ubuntu 24.04 的 GCP Compute Engine VM 為 Origin,並分別以 Nginx、Apache2 作為 Web Server 範例。能管理 GCP Firewall 時,由 Cloud Run Job 更新 Firewall rule,Cloud Scheduler 負責每日觸發,不在 Origin VM 執行 updater;無法控制 GCP Firewall 時,才改在 VM 上設定 Nginx 或 Apache2 來源限制。
實作範圍與 GCP VM 網路拓樸
實作環境簡化如下:
Cloud Scheduler ──每日觸發──> Cloud Run Job
                                  │
                                  │ 更新 sourceRanges
                                  ▼
                         GCP VPC Firewall

Visitor
   │
   ▼
Cloudflare Proxy
   │ Cloudflare source IP
   ▼
GCP VPC Firewall
   │ TCP 443
   ▼
Compute Engine VM
   └── Nginx 或 Apache2
| 項目 | 範例值 | 用途 |
|---|---|---|
| GCP project | PROJECT_ID |
Compute Engine 與 Firewall 所在專案 |
| VPC network | default |
VM 所屬網路;正式環境可使用自訂 VPC |
| VM | cloudflare-origin-vm |
Origin 主機 |
| Zone | asia-east1-b |
VM 所在 zone |
| Region | asia-east1 |
Cloud Run Job 與 Cloud Scheduler 區域 |
| Network tag | cf-origin |
將 Firewall rule 限定到目標 VM |
| Origin IPv4 | 203.0.113.10 |
RFC 5737 文件位址,必須換成自有 VM IP |
| Hostname | www.example.com |
必須換成自有且已啟用 Proxy 的網域 |
| HTTPS port | 443 |
對外服務 port |
主線只處理具有固定外部 IPv4 的 VM。只有網站確實提供 HTTP-to-HTTPS redirect 時才開放 80;沒有這項需求就只允許 443。
控制點選擇
| 方案 | Updater 執行位置 | 阻擋位置 | 適用條件 |
|---|---|---|---|
| GCP VPC Firewall | Cloud Run Job + Cloud Scheduler | Request 抵達 VM 前 | 可以管理 GCP 網路與 IAM |
Nginx allow/deny |
Origin VM + systemd timer | Nginx access phase | 無法調整 GCP Firewall,且使用 Nginx |
Apache2 Require ip |
Origin VM + systemd timer | Apache authorization phase | 無法調整 GCP Firewall,且使用 Apache2 |
GCP Firewall 是較合適的主要方案:未授權封包不會進入 Web Server,也不受 Nginx real_ip 或 Apache2 mod_remoteip 改寫 client address 的影響。Cloud Run Job 與 Origin VM 分離,即使 VM 停機或重建,Firewall updater 仍能按排程同步 Cloudflare CIDR。Web Server 方案仍可達到來源限制,但 TCP 與 TLS 已經抵達 VM,且 updater 會隨 VM 停機而停止執行。
驗收基準
正常 Cloudflare 路徑必須維持可用,而且 request 必須確實抵達 Origin。測試時應選擇已設定為不快取的 health check endpoint,並使用唯一識別值:
ORIGIN_CHECK_ID="origin-check-$(date -u +%Y%m%dT%H%M%SZ)-${RANDOM}"

curl --noproxy '*' \
  --silent \
  --show-error \
  --dump-header - \
  --output /dev/null \
  "https://www.example.com/healthz?origin_check=${ORIGIN_CHECK_ID}"

printf 'Origin access log 應出現:%s\n' "$ORIGIN_CHECK_ID"
/healthz 必須換成實際存在且明確繞過 Cloudflare cache 的 endpoint。接著在 Origin VM 搜尋相同識別值;實際 log path 若已自訂,應使用目前 VirtualHost 的設定:
# Nginx
sudo grep --fixed-strings 'origin-check-REPLACE_WITH_ACTUAL_ID' \
  /var/log/nginx/access.log

# Apache2
sudo grep --fixed-strings 'origin-check-REPLACE_WITH_ACTUAL_ID' \
  /var/log/apache2/access.log
只有 HTTP response 成功而 access log 沒有這筆 request,不能證明 Cloudflare 已連到 Origin;response 可能來自 Cloudflare cache。
從一般網路指定自有 Origin IP 的連線則必須失敗:
curl --noproxy '*' \
  --verbose \
  --connect-timeout 5 \
  --resolve 'www.example.com:443:203.0.113.10' \
  --output /dev/null \
  'https://www.example.com/'
203.0.113.10 不可直接拿來測試,它只是文件 placeholder。實際驗證只能替換成自己管理或明確取得授權的 Origin IP。
上述指令同時受到 TCP、TLS 與 HTTP 三層結果影響。如果 Origin 使用 Cloudflare Origin CA certificate,一般 curl 可能因不信任簽發者而中止;這只能證明 client-side TLS 驗證失敗,不能證明 Nginx/Apache2 已執行來源限制。HTTP authorization 的獨立驗證方式會在「驗證與適用範圍」說明。
Full (strict) 不屬於本節的來源限制。它讓 Cloudflare 驗證 Origin certificate,並不驗證連入 Origin 的 client 是 Cloudflare;兩者需要分開設定與驗收。
既有網路與 Web Server 設定盤點
來源限制會直接影響網站可用性。建立新規則前,必須先確認 VM、Firewall target、服務 port 與管理路徑,尤其不能把網站的 80/443 規則和 SSH 管理規則混在一起。
GCP 專案、VM 與 Network tag
以下指令在 Cloud Shell 或已登入正確帳戶的管理環境執行:
PROJECT_ID="$(gcloud config get-value project)"
VM_NAME='cloudflare-origin-vm'
VM_ZONE='asia-east1-b'
VPC_NETWORK='default'
REGION='asia-east1'

printf 'project=%s\nvm=%s\nzone=%s\nnetwork=%s\nregion=%s\n' \
  "$PROJECT_ID" "$VM_NAME" "$VM_ZONE" "$VPC_NETWORK" "$REGION"
PROJECT_ID 是 Firewall 所屬 GCP project;VM_NAME 與 VM_ZONE 用來定位 Origin VM;VPC_NETWORK 限制 rule 位於指定 VPC;REGION 則供 Cloud Run Job 與 Cloud Scheduler 使用。
查看 VM 的 NIC、外部 IP 與 network tag:
gcloud compute instances describe "$VM_NAME" \
  --project="$PROJECT_ID" \
  --zone="$VM_ZONE" \
  --format='yaml(
    name,
    status,
    networkInterfaces[].network,
    networkInterfaces[].accessConfigs[].natIP,
    tags.items
  )'
確認輸出的 External IPv4 就是 Cloudflare DNS 記錄背後的 Origin。若 VM 使用 ephemeral IP,重新啟動後可能改變;正式環境應先配置 Static External IP。
VPC Firewall 規則
gcloud compute firewall-rules list \
  --project="$PROJECT_ID" \
  --filter="network:$VPC_NETWORK" \
  --format='table(
    name,
    direction,
    priority,
    disabled,
    sourceRanges.list():label=SOURCE_RANGES,
    allowed[].map().firewall_rule().list():label=ALLOW,
    targetTags.list():label=TARGET_TAGS
  )'
上述指令只列出 classic VPC Firewall rules。若組織、資料夾或專案可能使用 Hierarchical Firewall Policy、Global Network Firewall Policy 或 Regional Network Firewall Policy,還要查看套用到 VM NIC 的 effective firewall rules:
gcloud compute instances network-interfaces get-effective-firewalls "$VM_NAME" \
  --project="$PROJECT_ID" \
  --zone="$VM_ZONE" \
  --network-interface='nic0' \
  --format='table(
    type,
    firewall_policy_name,
    priority,
    action,
    direction,
    ip_ranges.list():label=IP_RANGES,
    name,
    disabled
  )'
需要找出的不是只有名稱包含 http 或 https 的規則,而是所有可能允許下列流量的 rule:
0.0.0.0/0對tcp:80、tcp:443開放。0.0.0.0/0對所有 protocol/port 開放。- 套用到整個 VPC,或 target tag 同樣命中 Origin VM。
- 更高優先序的 Hierarchical Firewall Policy 或 Network Firewall Policy。
GCP VPC Firewall 使用較小數字表示較高 priority;當沒有其他 ingress rule 符合時,VM 最終會落到 implied deny ingress。另一條仍有效的公開 ALLOW rule 會使 Cloudflare allowlist 失去限制效果,因此不能只確認新 rule 已建立。Google Cloud:VPC firewall rules
VM listener 與 VirtualHost
在 Origin VM 執行:
sudo ss --listening --numeric --tcp --process
Nginx:
sudo nginx -T
sudo nginx -t
Apache2:
sudo apache2ctl -S
sudo apache2ctl configtest
盤點內容至少包含:
– Web Server 實際監聽 `80`、`443`、`0.0.0.0` 或 `[::]` 的哪一組地址。
– www.example.com 位於哪個 server/VirtualHost。
– Default site 是否會把未知 hostname 送入正式 Application。
– 是否已啟用 Nginx real_ip 或 Apache2 mod_remoteip。
– Health check、Webhook 或內部監控是否需要不經 Cloudflare 直連。
管理用途的固定來源不能混入自動產生的 Cloudflare 檔案,否則下次同步會被覆蓋。確有例外需求時,應建立獨立、人工維護的 Firewall rule 或 include,並記錄來源、port、用途與到期日。
Cloudflare IP API 與 CIDR 驗證
Cloudflare 提供不需要 API token 的 IP API:
curl --fail \
  --silent \
  --show-error \
  --connect-timeout 5 \
  --max-time 20 \
  'https://api.cloudflare.com/client/v4/ips'
回應中與本實作有關的欄位如下:
| 欄位 | 用途 |
|---|---|
success |
API request 是否成功 |
result.ipv4_cidrs |
Cloudflare IPv4 CIDR 陣列 |
result.ipv6_cidrs |
Cloudflare IPv6 CIDR 陣列 |
result.etag |
清單內容識別值,便於 log 與變更判斷 |
Cloudflare 官方將 etag 定義為 IP 資料的 digest,並分別提供 IPv4、IPv6 清單:Cloudflare IP API。GCP 路線會確認 API 成功且清單非空,再交由 gcloud 更新;VM 上的 Web Server 路線則以 Python ipaddress 進一步驗證每一筆 CIDR。
GCP VPC Firewall 來源限制
GCP Firewall rule 屬於 VPC control plane,不是 VM 內的設定;停止 VM 不會刪除或停用 rule。需要與 VM 分離的是每日更新工作,因此本路線使用 Cloud Run Job,而不是在 Origin VM 執行 systemd updater。
GCP Firewall rule 應以 target network tag 限定到 Origin VM,避免同一 VPC 內其他 VM 的 443 一併受到影響。Google Cloud 說明 network tag 可以在 VM 運作中新增,而且 gcloud compute instances add-tags 會保留既有 tag。Google Cloud:Add network tags
VM Target tag
在 Cloud Shell 執行:
gcloud compute instances add-tags "$VM_NAME" \
  --project="$PROJECT_ID" \
  --zone="$VM_ZONE" \
  --tags='cf-origin'

gcloud compute instances describe "$VM_NAME" \
  --project="$PROJECT_ID" \
  --zone="$VM_ZONE" \
  --format='get(tags.items)'
輸出必須包含 cf-origin。
Disabled allow rule
先以文件 CIDR 建立 disabled rule。Rule 尚未啟用,因此 placeholder 不會影響正式流量:
gcloud compute firewall-rules create allow-cloudflare-to-origin-v4 \
  --project="$PROJECT_ID" \
  --network="$VPC_NETWORK" \
  --direction=INGRESS \
  --priority=1000 \
  --action=ALLOW \
  --rules='tcp:443' \
  --source-ranges='192.0.2.0/24' \
  --target-tags='cf-origin' \
  --description='Managed by Cloudflare IP updater' \
  --disabled
各參數的作用如下:
| 參數 | 作用 |
|---|---|
--direction=INGRESS |
控制進入 VM 的新連線 |
--priority=1000 |
Rule 評估順序;數字越小優先序越高 |
--action=ALLOW |
只允許符合 source range 的流量 |
--rules=tcp:443 |
只開放 HTTPS |
--source-ranges |
第一輪同步前的暫存值 |
--target-tags=cf-origin |
只套用到具有該 tag 的 VM |
--disabled |
完成同步及驗證前不生效 |
網站確實需要 port 80 時,將 --rules 改為:
--rules='tcp:80,tcp:443'
啟用 Cloud Run 與建置所需 API
後續操作都在 Cloud Shell 執行,不需要登入 Origin VM:
gcloud services enable \
  compute.googleapis.com \
  run.googleapis.com \
  cloudscheduler.googleapis.com \
  cloudbuild.googleapis.com \
  artifactregistry.googleapis.com \
  --project="$PROJECT_ID"
Cloud Run Job service account
Cloud Run Job 使用獨立 service account。Custom Role 只提供讀取及更新 classic VPC Firewall rule 所需權限:
CLOUD_RUN_JOB='cloudflare-fw-sync'
UPDATER_SERVICE_ACCOUNT_NAME='cloudflare-fw-updater'
UPDATER_SERVICE_ACCOUNT="${UPDATER_SERVICE_ACCOUNT_NAME}@${PROJECT_ID}.iam.gserviceaccount.com"
UPDATER_ROLE_ID='cloudflareFirewallUpdater'

gcloud iam service-accounts create "$UPDATER_SERVICE_ACCOUNT_NAME" \
  --project="$PROJECT_ID" \
  --display-name='Cloudflare Firewall Updater'

gcloud iam roles create "$UPDATER_ROLE_ID" \
  --project="$PROJECT_ID" \
  --title='Cloudflare Firewall Updater' \
  --description='Read and update classic VPC firewall rules' \
  --permissions='compute.firewalls.get,compute.firewalls.update' \
  --stage=GA

gcloud projects add-iam-policy-binding "$PROJECT_ID" \
  --member="serviceAccount:${UPDATER_SERVICE_ACCOUNT}" \
  --role="projects/${PROJECT_ID}/roles/${UPDATER_ROLE_ID}"
compute.firewalls.update 是實際更新 rule 的權限,compute.firewalls.get 則用於變更前後比對。這組 project-level Custom Role 仍可更新 project 內其他 classic VPC Firewall rules,IAM 本身無法限定單一 rule 名稱;高隔離需求應使用獨立 project 或另外設計受控的管理服務。Google Cloud:firewalls.update
建立 Cloud Run Job 程式
在 Cloud Shell 建立工作目錄:
mkdir -p "$HOME/cloudflare-fw-sync"
cd "$HOME/cloudflare-fw-sync"
nano update.sh
update.sh 只處理必要流程:取得 Cloudflare 官方清單、確認 API 成功且 CIDR 陣列非空,再更新指定的 Firewall rule。
#!/usr/bin/env bash
set -Eeuo pipefail

: "${PROJECT_ID:?PROJECT_ID is required}"
: "${RULE_V4:?RULE_V4 is required}"
RULE_V6="${RULE_V6:-}"

API_RESPONSE="$(curl \
  --fail \
  --silent \
  --show-error \
  --connect-timeout 5 \
  --max-time 20 \
  --retry 3 \
  'https://api.cloudflare.com/client/v4/ips')"

jq --exit-status '.success == true' >/dev/null <<< "$API_RESPONSE"

CF_IPV4="$(jq --exit-status --raw-output '
  .result.ipv4_cidrs
  | if type == "array" and length > 0
    then join(",")
    else error("ipv4_cidrs is empty")
    end
' <<< "$API_RESPONSE")"

gcloud compute firewall-rules update "$RULE_V4" \
  --project="$PROJECT_ID" \
  --source-ranges="$CF_IPV4" \
  --quiet

if [[ -n "$RULE_V6" ]]; then
  CF_IPV6="$(jq --exit-status --raw-output '
    .result.ipv6_cidrs
    | if type == "array" and length > 0
      then join(",")
      else error("ipv6_cidrs is empty")
      end
  ' <<< "$API_RESPONSE")"

  gcloud compute firewall-rules update "$RULE_V6" \
    --project="$PROJECT_ID" \
    --source-ranges="$CF_IPV6" \
    --quiet
fi

echo 'Cloudflare Firewall sync completed.'
設定執行權限,再建立 Dockerfile:
chmod 0755 update.sh
nano Dockerfile
FROM gcr.io/google.com/cloudsdktool/google-cloud-cli:stable

RUN apt-get update \
    && apt-get install --yes --no-install-recommends ca-certificates curl jq \
    && rm -rf /var/lib/apt/lists/* \
    && install -d -o 65532 -g 65532 /app

COPY --chown=65532:65532 update.sh /app/update.sh

USER 65532:65532
ENV CLOUDSDK_CONFIG=/tmp/gcloud

ENTRYPOINT ["/app/update.sh"]
:stable 適合快速建立範例;正式環境應將 base image 固定到明確版本或 digest,並定期更新。Google Cloud:Google Cloud CLI Docker image
部署並手動執行 Cloud Run Job
主線先只處理 IPv4:
執行部署的帳戶需要 Cloud Run Job 與 source build 的建立權限,也必須能以 UPDATER_SERVICE_ACCOUNT 作為 runtime service account;這是部署者權限,不要授予 Cloud Run Job 本身。
gcloud run jobs deploy "$CLOUD_RUN_JOB" \
  --project="$PROJECT_ID" \
  --region="$REGION" \
  --source=. \
  --service-account="$UPDATER_SERVICE_ACCOUNT" \
  --set-env-vars="PROJECT_ID=$PROJECT_ID,RULE_V4=allow-cloudflare-to-origin-v4" \
  --tasks=1 \
  --max-retries=1 \
  --task-timeout=300s

gcloud run jobs execute "$CLOUD_RUN_JOB" \
  --project="$PROJECT_ID" \
  --region="$REGION" \
  --wait
Cloud Run 使用指定的 service account 取得短效 credential,不需要 service account key JSON,也不需要在 Origin VM 安裝 gcloud。--max-retries=1 代表失敗後可再執行一次;重複套用相同 sourceRanges 不會改變規則的最終內容。Google Cloud:Create jobs
IPv4 與 IPv6 使用兩條獨立 rule,也會產生兩次 update operation。若 IPv4 成功、IPv6 失敗,Cloud Run execution 會失敗;retry 會再次套用 IPv4,再嘗試 IPv6。
Cloud Run Job 第一次執行會把 disabled rule 的 placeholder 換成 Cloudflare 官方 IPv4 CIDR。確認後再啟用:
gcloud compute firewall-rules describe allow-cloudflare-to-origin-v4 \
  --project="$PROJECT_ID" \
  --format='yaml(disabled,sourceRanges,allowed,targetTags)'

gcloud compute firewall-rules update allow-cloudflare-to-origin-v4 \
  --project="$PROJECT_ID" \
  --no-disabled
Cloudflare hostname 在切換前的成功,只能證明網站原本可用,不能證明新 allow rule 已經命中,因為舊的公開 rule 此時仍在放行。確認新 rule 已啟用後,停用原本對全 Internet 開放的 HTTPS rule:
OPEN_HTTPS_RULE='REPLACE_WITH_EXISTING_RULE_NAME'

gcloud compute firewall-rules update "$OPEN_HTTPS_RULE" \
  --project="$PROJECT_ID" \
  --disabled
停用後,使用「驗收基準」中的不快取 endpoint 與唯一識別值重新測試。只有 Cloudflare path 成功,而且 Origin access log 出現相同識別值,才能證明 Cloudflare 流量通過新 rule 抵達 Origin。再列出所有 effective firewall rules,確認沒有另一條 0.0.0.0/0 → tcp:443 或 ALLOW all 命中同一 VM。GCP 的 allowlist 是所有 matching rules 的綜合結果,不是只看 allow-cloudflare-to-origin-v4 一條 rule。
Cloud Scheduler 每日觸發
建立只負責觸發 Cloud Run Job 的 service account,並將 roles/run.invoker 限定在這個 Job:
SCHEDULER_SERVICE_ACCOUNT_NAME='cloudflare-fw-scheduler'
SCHEDULER_SERVICE_ACCOUNT="${SCHEDULER_SERVICE_ACCOUNT_NAME}@${PROJECT_ID}.iam.gserviceaccount.com"
SCHEDULER_JOB='cloudflare-fw-daily-sync'

gcloud iam service-accounts create "$SCHEDULER_SERVICE_ACCOUNT_NAME" \
  --project="$PROJECT_ID" \
  --display-name='Cloudflare Firewall Scheduler'

gcloud run jobs add-iam-policy-binding "$CLOUD_RUN_JOB" \
  --project="$PROJECT_ID" \
  --region="$REGION" \
  --member="serviceAccount:${SCHEDULER_SERVICE_ACCOUNT}" \
  --role='roles/run.invoker'
建立每天台灣時間 03:15 執行的 Scheduler job:
gcloud scheduler jobs create http "$SCHEDULER_JOB" \
  --project="$PROJECT_ID" \
  --location="$REGION" \
  --schedule='15 3 * * *' \
  --time-zone='Asia/Taipei' \
  --uri="https://run.googleapis.com/v2/projects/${PROJECT_ID}/locations/${REGION}/jobs/${CLOUD_RUN_JOB}:run" \
  --http-method=POST \
  --oauth-service-account-email="$SCHEDULER_SERVICE_ACCOUNT"
Cloud Scheduler 官方支援使用上述 Cloud Run Jobs API endpoint 定時執行 Job:Google Cloud:Execute jobs on a schedule。建立後先手動觸發並查看 Cloud Run execution:
gcloud scheduler jobs run "$SCHEDULER_JOB" \
  --project="$PROJECT_ID" \
  --location="$REGION"

gcloud run jobs executions list \
  --project="$PROJECT_ID" \
  --region="$REGION" \
  --job="$CLOUD_RUN_JOB" \
  --limit=5

gcloud run jobs logs read "$CLOUD_RUN_JOB" \
  --project="$PROJECT_ID" \
  --region="$REGION" \
  --limit=50
Scheduler 顯示成功,只代表 Cloud Run Jobs API 接受觸發請求;Firewall 是否同步成功,仍要以 Cloud Run execution 狀態、Job log 與 live source ranges 判斷。這套排程不依賴 Origin VM,因此 VM 停機期間仍會持續執行。
VM Web Server allowlist 共用元件
本節只適用於無法管理 GCP Firewall、改由 Nginx 或 Apache2 限制來源的環境。採用 Cloud Run Job 管理 GCP Firewall 時,不需要在 Origin VM 安裝這些 updater 元件。
共用工具與目錄
sudo apt update
sudo apt install --yes curl diffutils python3 util-linux

sudo install -d -m 0755 /usr/local/libexec
curl 負責 HTTPS request 與 timeout/retry,Python 標準函式庫的 ipaddress 負責 CIDR 驗證,cmp 用來判斷設定是否改變,flock 則由 util-linux 提供,用來防止 systemd 工作重疊。
CIDR Fetcher
建立檔案:
sudo nano /usr/local/libexec/fetch-cloudflare-cidrs
內容如下:
#!/usr/bin/env bash
set -Eeuo pipefail

umask 022

if [[ "$#" -ne 1 ]]; then
  echo "Usage: $0 OUTPUT_DIRECTORY" >&2
  exit 64
fi

OUTPUT_DIRECTORY="$1"
API_URL='https://api.cloudflare.com/client/v4/ips'

case "$OUTPUT_DIRECTORY" in
  /*) ;;
  *)
    echo 'OUTPUT_DIRECTORY must be an absolute path.' >&2
    exit 64
    ;;
esac

WORK_DIRECTORY="$(mktemp -d)"

cleanup() {
  rm -rf -- "$WORK_DIRECTORY"
}
trap cleanup EXIT

curl \
  --fail \
  --silent \
  --show-error \
  --location \
  --connect-timeout 5 \
  --max-time 20 \
  --retry 3 \
  --retry-delay 2 \
  --retry-all-errors \
  --output "$WORK_DIRECTORY/response.json" \
  "$API_URL"

python3 - "$WORK_DIRECTORY/response.json" "$WORK_DIRECTORY" <<'PY'
import ipaddress
import json
import pathlib
import sys

response_path = pathlib.Path(sys.argv[1])
output_path = pathlib.Path(sys.argv[2])

try:
    payload = json.loads(response_path.read_text(encoding="utf-8"))
except (OSError, UnicodeError, json.JSONDecodeError) as exc:
    raise SystemExit(f"Invalid Cloudflare API response: {exc}")

if not isinstance(payload, dict) or payload.get("success") is not True:
    raise SystemExit("Cloudflare API did not return success=true")

result = payload.get("result")
if not isinstance(result, dict):
    raise SystemExit("Cloudflare API result is missing")


def canonical_networks(field: str, version: int) -> list[str]:
    raw_networks = result.get(field)
    if not isinstance(raw_networks, list) or not raw_networks:
        raise SystemExit(f"{field} is empty or is not an array")
    if len(raw_networks) > 256:
        raise SystemExit(f"{field} contains an unexpected number of entries")

    networks = set()
    for value in raw_networks:
        if not isinstance(value, str):
            raise SystemExit(f"{field} contains a non-string value")
        try:
            network = ipaddress.ip_network(value, strict=True)
        except ValueError as exc:
            raise SystemExit(f"Invalid CIDR in {field}: {value}: {exc}")
        if network.version != version:
            raise SystemExit(f"Wrong IP version in {field}: {value}")
        networks.add(network)

    ordered = sorted(
        networks,
        key=lambda item: (int(item.network_address), item.prefixlen),
    )
    return [str(item) for item in ordered]


ipv4_networks = canonical_networks("ipv4_cidrs", 4)
ipv6_networks = canonical_networks("ipv6_cidrs", 6)
etag = result.get("etag", "")

if not isinstance(etag, str):
    raise SystemExit("etag is not a string")

(output_path / "ipv4.txt").write_text(
    "\n".join(ipv4_networks) + "\n",
    encoding="utf-8",
)
(output_path / "ipv6.txt").write_text(
    "\n".join(ipv6_networks) + "\n",
    encoding="utf-8",
)
(output_path / "etag").write_text(etag + "\n", encoding="utf-8")
PY

install -d -m 0755 "$OUTPUT_DIRECTORY"
install -m 0644 "$WORK_DIRECTORY/ipv4.txt" "$OUTPUT_DIRECTORY/ipv4.txt"
install -m 0644 "$WORK_DIRECTORY/ipv6.txt" "$OUTPUT_DIRECTORY/ipv6.txt"
install -m 0644 "$WORK_DIRECTORY/etag" "$OUTPUT_DIRECTORY/etag"

printf 'Validated Cloudflare CIDRs: IPv4=%s IPv6=%s etag=%s\n' \
  "$(wc -l < "$OUTPUT_DIRECTORY/ipv4.txt")" \
  "$(wc -l < "$OUTPUT_DIRECTORY/ipv6.txt")" \
  "$(cat "$OUTPUT_DIRECTORY/etag")"
設定權限並手動驗證:
sudo chown root:root /usr/local/libexec/fetch-cloudflare-cidrs
sudo chmod 0755 /usr/local/libexec/fetch-cloudflare-cidrs

CF_TEST_DIRECTORY='/run/cloudflare-ip-test'
sudo install -d -m 0755 "$CF_TEST_DIRECTORY"
sudo /usr/local/libexec/fetch-cloudflare-cidrs "$CF_TEST_DIRECTORY"
sudo cat "$CF_TEST_DIRECTORY/ipv4.txt"
sudo cat "$CF_TEST_DIRECTORY/ipv6.txt"
sudo rm -r -- "$CF_TEST_DIRECTORY"
只有 HTTP request、JSON schema、非空清單、IP version 與 canonical CIDR 全部通過檢查,fetcher 才會產生輸出;任何錯誤都以非零 exit code 結束,不會修改現有 Nginx 或 Apache2 設定。
Nginx 來源限制
無法管理 GCP Firewall 時,可以在 Nginx 的 server context 使用 allow/deny。Nginx 會依設定順序比對,第一條符合的規則就決定結果;因此 Cloudflare allow 必須放在 deny all 前面。NGINX:HTTP Access module
Nginx allowlist updater
建立 updater:
sudo nano /usr/local/sbin/update-cloudflare-nginx-allowlist
#!/usr/bin/env bash
set -Eeuo pipefail

umask 077

TARGET_FILE='/etc/nginx/snippets/cloudflare-origin-allowlist.conf'
FETCHER='/usr/local/libexec/fetch-cloudflare-cidrs'
WORK_DIRECTORY="$(mktemp -d)"

cleanup() {
  rm -rf -- "$WORK_DIRECTORY"
}
trap cleanup EXIT

"$FETCHER" "$WORK_DIRECTORY/candidate"

{
  echo '# Generated from the Cloudflare IP API. Do not edit.'
  while IFS= read -r cidr; do
    printf 'allow %s;\n' "$cidr"
  done < "$WORK_DIRECTORY/candidate/ipv4.txt"
  while IFS= read -r cidr; do
    printf 'allow %s;\n' "$cidr"
  done < "$WORK_DIRECTORY/candidate/ipv6.txt"
} > "$WORK_DIRECTORY/cloudflare-origin-allowlist.conf"

install -d -m 0755 /etc/nginx/snippets
if [[ -f "$TARGET_FILE" ]] \
  && cmp --silent "$WORK_DIRECTORY/cloudflare-origin-allowlist.conf" "$TARGET_FILE"; then
  echo 'No change: Nginx Cloudflare allowlist'
  exit 0
fi

install -m 0644 \
  "$WORK_DIRECTORY/cloudflare-origin-allowlist.conf" \
  "$TARGET_FILE"

if ! nginx -t; then
  echo 'Nginx config test failed; reload skipped.' >&2
  exit 1
fi

if ! systemctl reload nginx; then
  echo 'Nginx reload failed.' >&2
  exit 1
fi

echo 'Updated and reloaded Nginx Cloudflare allowlist.'
設定權限並先產生 include:
sudo chown root:root /usr/local/sbin/update-cloudflare-nginx-allowlist
sudo chmod 0755 /usr/local/sbin/update-cloudflare-nginx-allowlist
sudo /usr/local/sbin/update-cloudflare-nginx-allowlist
Nginx server 設定
在 www.example.com 的 HTTPS server block 加入:
server {
    listen 443 ssl;
    listen [::]:443 ssl;
    server_name www.example.com;

    include /etc/nginx/snippets/cloudflare-origin-allowlist.conf;
    deny all;

    # 既有 TLS、root 或 proxy_pass 設定保留於此。
}
若 VM 沒有 public IPv6,可以不使用 listen [::]:443 ssl;。若 Web Server 確實透過 public IPv6 對外,Cloudflare IPv6 allowlist 與 GCP IPv6 Firewall 都必須同步處理。
執行設定檢查與 reload:
sudo nginx -t
sudo systemctl reload nginx
allow/deny 設在 server context 時,只有下層 location 沒有自己的 allow/deny 才會繼承。既有設定若在某個 location 重新宣告 access rule,必須確認它沒有覆蓋 Cloudflare 限制。
Default server 也不能把未知 SNI/Host 送進正式 Application。應使用獨立 default server 拒絕未知 hostname;HTTPS default server 仍需沿用有效的 TLS 設定,不能只貼一個缺少 certificate 的不完整 listen 443 ssl block。
Apache2 來源限制
無法管理 GCP Firewall 且使用 Apache2 時,才在 VirtualHost 的 authorization phase 套用 Cloudflare 來源限制。
Apache 2.4 使用 Require ip 控制來源,不使用已 deprecated 的 Order、Allow、Deny。Require ip 支援 IPv4、IPv6 與 CIDR,並在 authorization phase 對所有 HTTP method 生效。Apache HTTP Server:mod_authz_host
Apache2 allowlist updater
建立 updater:
sudo nano /usr/local/sbin/update-cloudflare-apache-allowlist
#!/usr/bin/env bash
set -Eeuo pipefail

umask 077

TARGET_FILE='/etc/apache2/cloudflare-origin-allowlist.conf'
FETCHER='/usr/local/libexec/fetch-cloudflare-cidrs'
WORK_DIRECTORY="$(mktemp -d)"

cleanup() {
  rm -rf -- "$WORK_DIRECTORY"
}
trap cleanup EXIT

"$FETCHER" "$WORK_DIRECTORY/candidate"

{
  echo '# Generated from the Cloudflare IP API. Do not edit.'
  echo '<RequireAny>'
  while IFS= read -r cidr; do
    printf '    Require ip %s\n' "$cidr"
  done < "$WORK_DIRECTORY/candidate/ipv4.txt"
  while IFS= read -r cidr; do
    printf '    Require ip %s\n' "$cidr"
  done < "$WORK_DIRECTORY/candidate/ipv6.txt"
  echo '</RequireAny>'
} > "$WORK_DIRECTORY/cloudflare-origin-allowlist.conf"

if [[ -f "$TARGET_FILE" ]] \
  && cmp --silent "$WORK_DIRECTORY/cloudflare-origin-allowlist.conf" "$TARGET_FILE"; then
  echo 'No change: Apache2 Cloudflare allowlist'
  exit 0
fi

install -m 0644 \
  "$WORK_DIRECTORY/cloudflare-origin-allowlist.conf" \
  "$TARGET_FILE"

if ! apache2ctl configtest; then
  echo 'Apache2 config test failed; reload skipped.' >&2
  exit 1
fi

if ! systemctl reload apache2; then
  echo 'Apache2 reload failed.' >&2
  exit 1
fi

echo 'Updated and reloaded Apache2 Cloudflare allowlist.'
設定權限並產生第一份 include:
sudo chown root:root /usr/local/sbin/update-cloudflare-apache-allowlist
sudo chmod 0755 /usr/local/sbin/update-cloudflare-apache-allowlist
sudo /usr/local/sbin/update-cloudflare-apache-allowlist
Apache2 VirtualHost 設定
在 www.example.com 的 HTTPS VirtualHost 加入:
<VirtualHost *:443>
    ServerName www.example.com

    <Location "/">
        Include /etc/apache2/cloudflare-origin-allowlist.conf
    </Location>

    # 既有 TLS、DocumentRoot 或 ProxyPass 設定保留於此。
</VirtualHost>
檢查 VirtualHost 與設定語法:
sudo apache2ctl -S
sudo apache2ctl configtest
sudo systemctl reload apache2
Include 刻意放在目標 VirtualHost 的 <Location "/">,避免來源限制意外套用到同一台主機上的管理站台或其他 hostname。其他 <Location>、<Directory> 或 Proxy authorization 規則仍可能影響合併結果,正式切換前要逐一測試公開 endpoint 與受保護 endpoint。
Default VirtualHost 不應代理到正式 Application。若同一台 VM 有多個網站,需要分別決定哪些 hostname 只接受 Cloudflare,不能把一個 site 的 allowlist 當成整台 Apache2 已受保護。
VM Web Server IP 清單自動更新
這組 systemd 設定只供 VM 上的 Nginx/Apache2 fallback 使用,兩種 updater 擇一執行:
| 採用方案 | systemd ExecStart 使用的程式 |
|---|---|
| Nginx | /usr/local/sbin/update-cloudflare-nginx-allowlist |
| Apache2 | /usr/local/sbin/update-cloudflare-apache-allowlist |
systemd service
建立 service:
sudo nano /etc/systemd/system/cloudflare-ip-update.service
以下範例使用 Nginx;採用 Apache2 時,只替換 ExecStart 最後一個路徑:
[Unit]
Description=Update Cloudflare Origin source allowlist
Wants=network-online.target
After=network-online.target

[Service]
Type=oneshot
ExecStart=/usr/bin/flock --nonblock /run/cloudflare-ip-update.lock /usr/local/sbin/update-cloudflare-nginx-allowlist
TimeoutStartSec=120
UMask=0022
PrivateTmp=true
NoNewPrivileges=true
工作以 root 執行,因為 updater 需要寫入 /etc 並 reload Nginx 或 Apache2。NoNewPrivileges=true 防止 updater 及其 child process 透過 setuid 等方式增加額外權限。
systemd timer
sudo nano /etc/systemd/system/cloudflare-ip-update.timer
[Unit]
Description=Daily Cloudflare IP allowlist update

[Timer]
OnCalendar=*-*-* 03:15:00 Asia/Taipei
Persistent=true
RandomizedDelaySec=30m
Unit=cloudflare-ip-update.service

[Install]
WantedBy=timers.target
Persistent=true 讓 VM 關機錯過排程後,在 timer 恢復時補跑一次;RandomizedDelaySec=30m 則將執行時間分散在 30 分鐘內,避免大量主機同時呼叫遠端 API。這兩個參數的行為可參考 systemd.timer(5)。
Service 與 Timer 驗證
sudo systemd-analyze verify \
  /etc/systemd/system/cloudflare-ip-update.service \
  /etc/systemd/system/cloudflare-ip-update.timer

sudo systemctl daemon-reload
sudo systemctl start cloudflare-ip-update.service
sudo systemctl status cloudflare-ip-update.service --no-pager

sudo systemctl enable --now cloudflare-ip-update.timer
systemctl list-timers cloudflare-ip-update.timer
手動執行成功後才啟用 timer。檢查最近一次同步 log:
sudo journalctl \
  --unit=cloudflare-ip-update.service \
  --since='2 days ago' \
  --no-pager
正常 log 應區分三種結果:
Validated:API 與 CIDR 已通過驗證。Updated and reloaded:內容已變更並成功套用。No change:內容相同,沒有執行 Web Server reload。
API timeout、JSON 錯誤或空清單發生在套用前,因此不會修改現行設定。Nginx/Apache2 的 config test 失敗時不會 reload;service 會回報 failed,便於從 journal 查明原因。VM 停機期間 timer 不會執行;Persistent=true 只能在 VM 恢復後補跑,不等同 Cloud Run 路線的獨立排程。
驗證與適用範圍
完整驗證矩陣
| 測試 | GCP Firewall 預期結果 | Nginx/Apache2 預期結果 |
|---|---|---|
| 不快取 endpoint 經 Cloudflare,且 Origin log 出現 request ID | 2xx、預期 3xx 或 Application 正常狀態 |
相同 |
一般 curl --resolve 從外部直連 Origin |
TCP timeout | HTTP 403;使用 Origin CA 時可能先發生憑證錯誤 |
使用 --cacert 或受控的 --insecure 驗證 HTTP 授權 |
TCP timeout | 必須回覆 HTTP 403 |
| Updater 第一次執行 | Cloud Run execution 更新 rule,再以 describe 確認 |
systemd service 更新 include、config test、reload |
| API 回傳無效 JSON/空清單 | Cloud Run execution failed,live rule 不變 | systemd service failed,現行 include 不變 |
| Web Server config test 失敗 | 不適用 | 不 reload,systemd service 回報 failed |
| Origin VM 停機 | Firewall rule 保留,Cloud Scheduler 照常觸發 | timer 停止,開機後由 Persistent=true 補跑 |
正常路徑使用「驗收基準」中的不快取 endpoint,並確認 Origin access log 出現相同 request ID。
Direct Origin HTTP authorization negative test:
curl --noproxy '*' \
  --insecure \
  --verbose \
  --connect-timeout 5 \
  --resolve 'www.example.com:443:203.0.113.10' \
  --output /dev/null \
  --write-out '\nHTTP %{http_code}\n' \
  'https://www.example.com/'
這裡的 --insecure 只用於自己管理或已取得授權的 Origin negative test,目的是略過 client-side certificate validation,繼續觀察 Web Server 的 HTTP authorization 結果;不能用於正常監控或正常 Cloudflare path。若已保存對應的 Origin CA root,應優先改用 --cacert /path/to/origin-ca-root.pem;Origin 使用公有 CA certificate 時則可直接移除 --insecure。
GCP Firewall 的 timeout 代表封包在 Web Server 前被丟棄;Nginx/Apache2 必須回覆 403,才能證明 request 已進入 HTTP processing,但被來源規則拒絕。一般 curl 的 Origin CA 憑證錯誤只證明測試端不信任簽發者,不能當成來源限制成功。兩種 allowlist 都能阻止 direct Origin access,防護層級並不相同。
IPv6
存在下列任一條件,就必須把 IPv6 納入同一份驗收:
- VM NIC 具有 External IPv6。
- DNS 存在直接指向 Origin 的 AAAA record。
- Nginx 或 Apache2 監聽
[::]:80/[::]:443,且該 listener 可從 Internet 抵達。
GCP 路線建立獨立 IPv6 rule:
gcloud compute firewall-rules create allow-cloudflare-to-origin-v6 \
  --project="$PROJECT_ID" \
  --network="$VPC_NETWORK" \
  --direction=INGRESS \
  --priority=1000 \
  --action=ALLOW \
  --rules='tcp:443' \
  --source-ranges='2001:db8::/32' \
  --target-tags='cf-origin' \
  --description='Managed by Cloudflare IP updater' \
  --disabled
在啟用 IPv6 rule 前,先把 rule 名稱加入 Cloud Run Job,然後手動執行並驗證:
gcloud run jobs update "$CLOUD_RUN_JOB" \
  --project="$PROJECT_ID" \
  --region="$REGION" \
  --update-env-vars='RULE_V6=allow-cloudflare-to-origin-v6'

gcloud run jobs execute "$CLOUD_RUN_JOB" \
  --project="$PROJECT_ID" \
  --region="$REGION" \
  --wait

gcloud compute firewall-rules describe allow-cloudflare-to-origin-v6 \
  --project="$PROJECT_ID" \
  --format='yaml(disabled,sourceRanges,allowed,targetTags)'

gcloud compute firewall-rules update allow-cloudflare-to-origin-v6 \
  --project="$PROJECT_ID" \
  --no-disabled
Cloud Run updater 驗證並換成 Cloudflare IPv6 CIDR 後,才能啟用這條 rule。Nginx 與 Apache2 updater 已同步產生 IPv4、IPv6 設定;沒有 public IPv6 時,即使檔案包含 IPv6 allowlist,也不會自行建立 IPv6 ingress。
Real IP address rewrite
Nginx allow/deny 與 Apache2 Require ip 會依 Web Server 當下認定的 client address 進行授權。啟用 Nginx real_ip 或 Apache2 mod_remoteip 後,該地址可能被改寫成真正訪客 IP,導致原本要比對 Cloudflare peer 的 allowlist 全部失敗,或因信任範圍錯誤而產生繞過。
GCP Firewall 不受 HTTP address rewrite 影響,因此仍是較穩定的控制點。必須同時在 Web Server 完成來源限制與訪客 IP 還原時,應以底層 connection peer 建立信任判斷,並在 access log 同時保留 peer IP 與 visitor IP。
控制邊界
Cloudflare 官方建議在 Origin 明確封鎖所有非 Cloudflare 或非可信來源流量,並將 IP allowlist 列為網路層保護方式;若需要密碼學上的來源驗證,應再使用 Authenticated Origin Pulls,或以 Cloudflare Tunnel 移除 public inbound path。Cloudflare:Protect your origin server
來源 allowlist 解決的是「誰能連進 Origin」,不處理下列問題:
- 不會自動還原真正 visitor IP。
- 不會驗證 Origin certificate。
- 不會停止訂單、付款或寄信等 Application 副作用。
- 不會取代帳號認證、授權與 server-side input validation。
- Global Cloudflare IP allowlist 只能證明來源位於 Cloudflare 網段,不能證明 request 來自特定 Cloudflare account。
完成條件不是看到新規則存在,而是同時證明正常 Cloudflare path 可用、Direct Origin path 失敗、無其他公開 allow rule,並確認所選 updater 的失敗行為。GCP Firewall 路線要驗證 Cloud Scheduler 與 Cloud Run execution;Nginx/Apache2 路線則要驗證 systemd timer、config test、reload 與 VM reboot 後補跑。
系列文章
參考資料
- Cloudflare:IP API
- Cloudflare:Cloudflare IP addresses
- Cloudflare:Protect your origin server
- Google Cloud:VPC firewall rules
- Google Cloud:Firewall rule evaluation order
- Google Cloud:Add network tags
- Google Cloud:
gcloud compute firewall-rules update - Google Cloud:Create Cloud Run jobs
- Google Cloud:Execute jobs on a schedule
- Google Cloud:Google Cloud CLI Docker image
- NGINX:HTTP Access module
- Apache HTTP Server:
mod_authz_host systemd.timer(5)